Categories
Family Friendly Vegetables

Honey Ginger Carrots
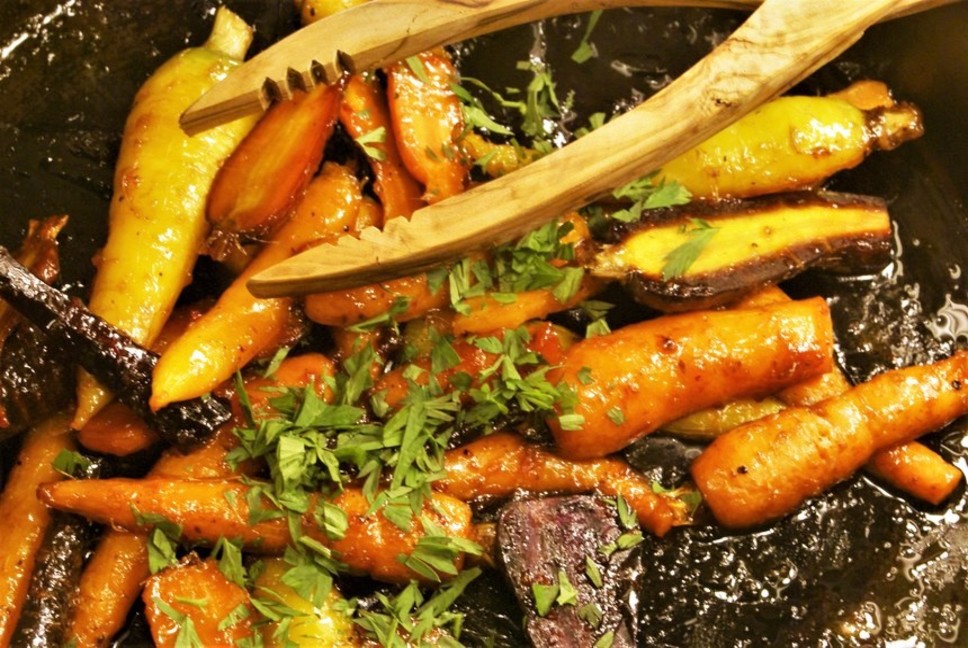
Honey Ginger Carrots

A beautiful and delicious glazed preparation for fresh spring carrots, using the carrot tops for garnish if available.  Carrots are in the same family as parsley with the leaves having a somewhat similar flavor profile.  Feel free to substitute one for the other. 

Did you know that carrots were originally purple? I used purple, orange, yellow and red carrots here. Using different colors provides your body with a variety of antioxidants.

Ingredients:

  • 1 tablespoon olive oil
  • 1 tablespoon finely chopped ginger (or ginger from tube – available in the grocery produce section)
  • 1 1/2 tablespoons honey
  • 6 medium carrots, scrubbed and cut lengthwise, leaving a short section of green tops if fresh.
  • Reserve 1 tablespoon of chopped fresh carrot tops if available. Otherwise use 1 tablespoon of chopped parsley.
  • 1/4 cup water
  • 1/4 cup orange juice
  • 1/2 lemon for finishing
  • Salt and pepper

Instructions:

  1. In a medium pan over medium-high heat, add oil and stir in ginger. Add honey and stir to dissolve.
  2. Add carrots and toss to coat. Pour in water and orange juice.
  3. Cover to steam, stirring occasionally and cook 15 -20 minutes or until tender and juices make a glaze, adding a tablespoon of water more if needed.
  4. Season to taste with salt and pepper. Serve with a squeeze of lemon and a sprinkling of chopped carrot tops or parsley.
Categories
Vegetables

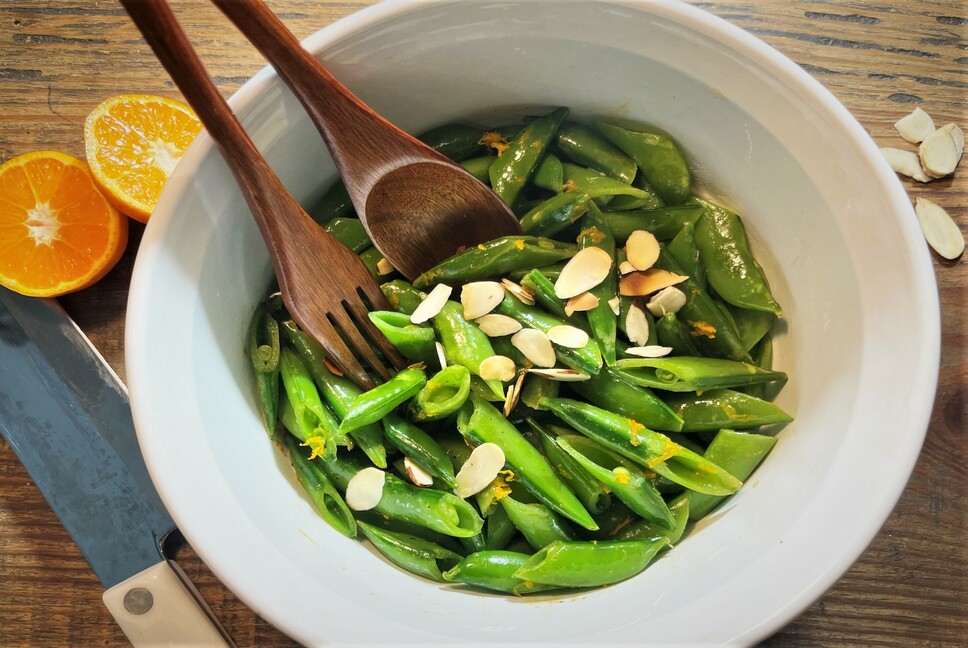
Sugar Snap Peas with Orange & Almond

Sugar Snap Peas with Orange & Almond

This a light and fresh side dish, great for Spring or Summer meals.

Ingredients:

  • Oil spray (avocado or olive oil)
  • 1/3 cup sliced almonds
  • 3/4 pound fresh sugar snap peas, trimmed and halved at an angle (about 4 cups)
  • 1 tablespoon vegan butter
  • 1/8 teaspoon Creole seasoning
  • 1 teaspoon orange zest, plus 1/4 cup fresh juice (from 1 large orange)
  • 2 tablespoons vegetable broth
  • Salt
  • Black pepper

Instructions:

  • Using a zester tool, zest the orange and set aside. Squeeze the orange and set the juice aside.
  • Spray a large non-stick pan with oil spray to coat. Heat the pan over medium-high heat and add sliced almonds, stirring gently until lightly toasted. Sprinkle with a small amount of salt. Remove from pan and set aside.
  • Spray the same pan with a small amount of oil spray. Add the peas and cook, stirring often, until tender-crisp, 3 to 4 minutes. Transfer peas to a serving dish.
  • Reduce heat to medium; melt 1 tablespoon vegan butter. Add Creole seasoning and cook, stirring constantly, until butter browns slightly, about 3 minutes. Stir in orange juice, vegetable broth and a couple of grinds of pepper. Cook, stirring constantly, until sauce is glossy and thickened slightly, about 2 minutes. Taste and adjust seasonings, adding salt if needed.
  • Spoon sauce over peas and sprinkle with orange zest. Then top with the toasted almonds and serve.
Categories
Family Friendly Mains Vegetables

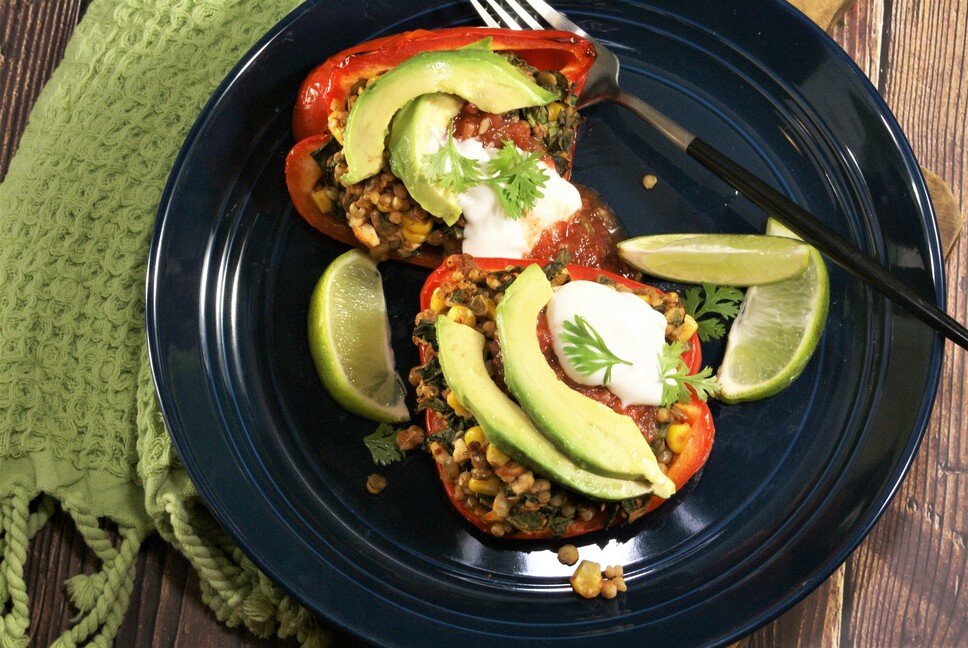
Sorghum Stuffed Peppers

Sorghum Stuffed Peppers

This is a recipe that is family friendly, hearty, and so flavorful that you will have it on frequent rotation.

Makes 4 servings as a main, or 8 servings as a side dish.

Ingredients

  • 2 cups cooked whole grain sorghum, cooled to room temperature
  • Avocado oil cooking spray
  • 4 large red bell peppers, halved and seeded
  • 3/4 cup salsa
  • 2 cloves garlic, minced
  • 1 Tbsp nutritional yeast
  • 1 tsp cumin powder
  • 1 tsp chili powder
  • 1 cup corn kernels, fresh or frozen and thawed
  • 2 cups cooked lentils
  • 1 cup chopped spinach or kale
  • ¼ tsp salt (optional)
  • ¼ tsp pepper

Toppings

  • 1 avocado, thinly sliced and 1/4 cup plain Greek yogurt (or avocado crema – see sauces section)
  • 1/2 cup salsa
  • Fresh cilantro sprigs
  • 2 Tbsp diced red onion
  • 1 lime, sliced into thin wedges

Instructions

  1. Preheat oven to 400 degrees F and spray a rimmed baking sheet with cooking spray.
  2. In a large mixing bowl, combine cooked sorghum, salsa, garlic, nutritional yeast, cumin, chili powder, corn, spinach (or kale), and lentils. Mix until combined.
  3. Stuff peppers with mixture, distributing evenly. Place peppers on baking sheet, and cover with tin foil.
  4. Bake for 20 minutes. Remove foil and bake for another 10 minutes, or until peppers are soft.
  5. Remove from the oven. Top each pepper with Greek yogurt and avocado slices (or avocado crema), a dollop of salsa, and a sprinkling of red onion and cilantro. Serve with a lime wedge.
Categories
Salads Vegetables

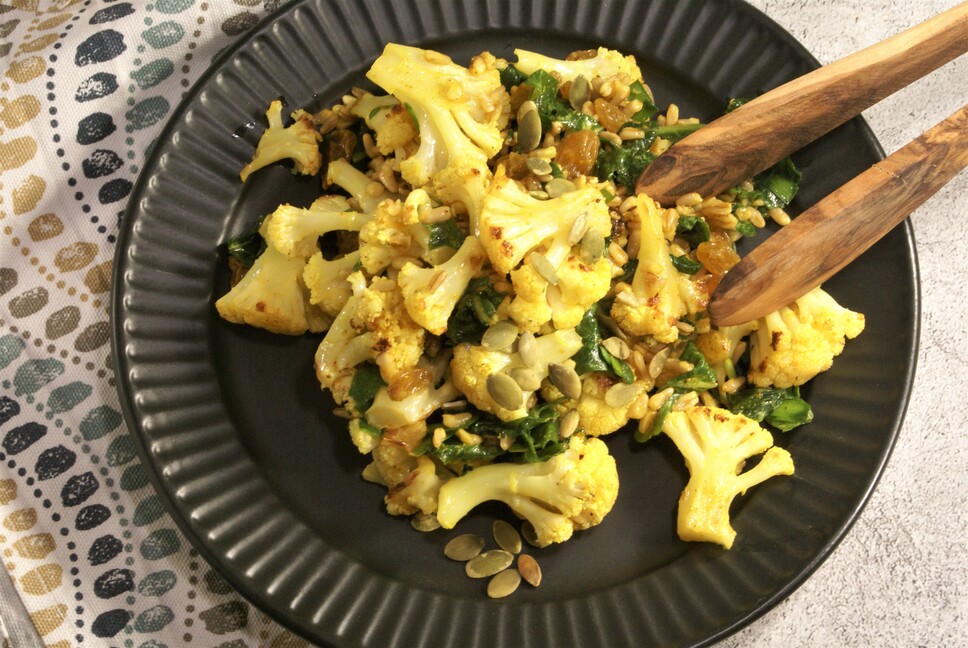
Curried Cauliflower & Grains

Curried Cauliflower & Grains

We all need to get more of the anti-inflammatory spice, turmeric, into our diet and this recipe provides a delicious way to do just that. This dish can be served warm as a side or chilled as a salad.

Ingredients

  • 1 head cauliflower, cut into florets
  • olive oil spray
  • 1/2 teaspoon pepper
  • 2 cups chopped Lacinato kale (or baby kale)
  • 1 cup cooked oat groats (or farro or other grain of your choice)
  • ½ cup cooked chickpeas (optional)
  • 1/3 cup golden raisins (optional)
  • 1/2 cup chopped scallions

Turmeric Dressing

  • 2 tablespoons olive oil
  • 2 tablespoons apple cider vinegar
  • 2 tablespoons maple syrup
  • 1 teaspoon turmeric powder
  • 1 teaspoon yellow curry powder
  • 1 clove finely minced or grated garlic
  • 1/2 teaspoon salt or to taste
  • cracked pepper to taste

Optional Garnishes

  • Pepitas (pumpkin seeds)
  • Toasted, sliced almonds
  • Chopped parsley

Instructions

  1. Preheat oven to 400.
  2. Trim leaves off the cauliflower, and cut into florets. Line a rimmed baking sheet with parchment paper and spray generously with oil spray. Place cauliflower on baking sheet and spray the surface with oil spray, stir the cauliflower pieces around to coat and arrange on the baking sheet without overcrowding. Top with a bit of cracked pepper. Roast in the oven, about 30 – 40 minutes, depending on the size of your florets. until tender and golden with some browned areas.
  3. Place the kale, grain, scallions, and optional chickpeas and raisins in a large bowl.
  4. Make the dressing: combine all dressing ingredients in a small bowl.
  5. Once the cauliflower is fork-tender, add to the bowl with the salad ingredients. Pour dressing over and mix until combined. Taste and adjust seasonings.
  6. This recipe is delicious served warm or chilled.

Adapted from FeastingatHome.com

Categories
Pasta Vegetables

Roasted Sunchokes

Roasted Sunchokes

Sunchokes are also called Jerusalem artichokes and are the tuberous portion of a sunflower plant. This recipe is a delicious way to prepare them. You will find sunchokes in your produce section in fall or winter. 

Note: If this is your first time eating these, take care not to eat too many (although it will be hard to resist). Sunchokes contain a high level of inulin, a favorite fiber of your gut microbiome. For some that are unaccustomed though, they may cause intestinal upset. 

Makes 4 servings

Ingredients

  • 1 lb sunchokes (Jerusalem artichokes),  scrubbed  and cut into 1/4 to 1/2 -inch thick slices
  • Olive oil spray
  • ½ teaspoon salt
  • Freshly ground black pepper
  • 1-2 sprigs fresh thyme, chopped

Instructions

  1. Preheat the oven to 425° F with a rack in the center position.
  2. Spray a rimmed baking sheet with olive oil spray. Spread the sunchokes in an even  layer, pressing the slices to ensure coating from the oiled pan surface. Then spray the top of the slices with oil spray.  Do not overcrowd to ensure even browning.
  3. Roast for 18 to 22 minutes, flipping the pieces halfway through, or until the sunchokes are lightly browned and fork tender.
  4. Sprinkle with freshly chopped thyme leaves and a light sprinkle of  salt and pepper, if desired. Serve immediately.


Adapted from ABeautifulPlate.com

Categories
Sauces, Dips & Dressings Vegetables

Roasted Garlic

Roasted Garlic

Roasting makes the garlic mellow and soft, perfect for spreading on toasted bread, or adding to recipes like mashed potatoes, pasta sauce, soups, hummus, etc. We like to roast a bunch and freeze some for later use.

Ingredients

  • Whole garlic bulbs
  • Extra virgin olive oil
  • Salt (optional)

Instructions

  1. Preheat the oven to 350°F.
  2. Trim the top ¼ inch off the top of the garlic bulbs.
  3. On a baking sheet, place the garlic cut-side up on a piece of foil, drizzle with olive oil, and use your finger or a brush to evenly coat the top of the exposed cloves. Sprinkle with salt if desired.
  4. Wrap the garlic in the foil and roast for 45 to 75 minutes or until the cloves are golden brown and soft.
  5. Use right away or freeze.
Categories
Sauces, Dips & Dressings Vegetables

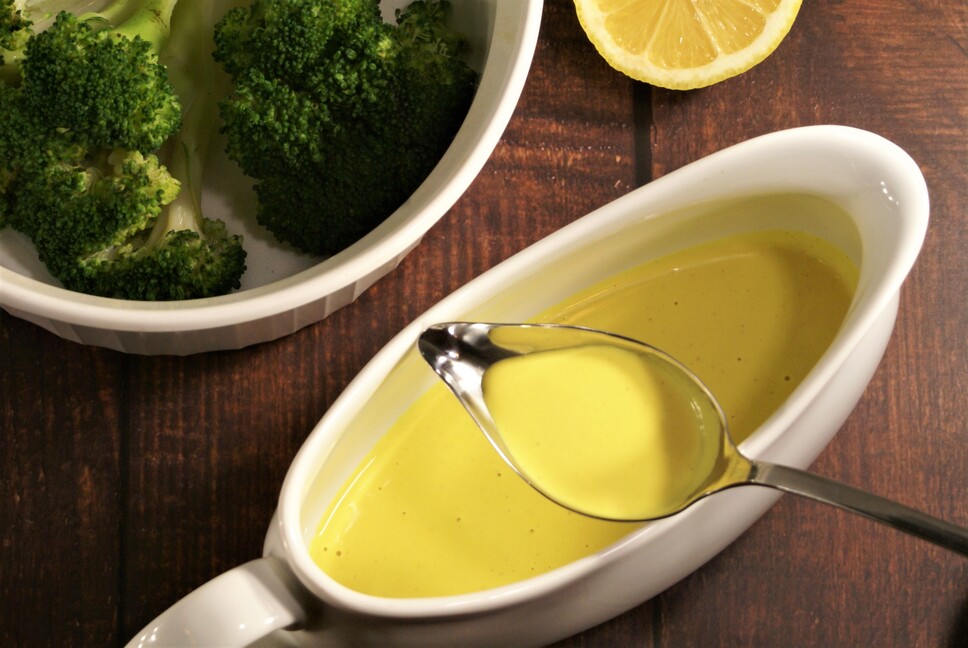
Healthy Hollandaise Sauce

Healthy Hollandaise Sauce

A creamy vegan hollandaise sauce that is easy to make and delicious served with vegetables or vegan eggs benedict.  Can be made ahead and rewarmed for use.

Makes 6 servings

Ingredients:

  • 1 cup Raw Cashews soaked in hot water for 30 to 60 minutes
  • 1/4 cup Nutritional Yeast 
  • 2 Tbsp Lemon Juice
  • 1 tsp Distilled White Vinegar
  • 1 cup Water 
  • 1/2 tsp Turmeric
  • 1 Tbsp Dijon Mustard
  • 1 Tbsp Plant-based butter
  • 1 tsp Garlic Powder
  • 1 tsp Onion Powder
  • 1/2 tsp Indian Black Salt (Kala Namak)*
  • 1/8 tsp Cayenne Pepper

Instructions:

  1. Soak the cashews in boiling water for 30 min to 1 hour. Drain.
  2. Add the soaked cashews to the blender along with the remainder of the ingredients.
  3. Blend until very smooth.
  4. Warm the sauce slightly for serving (do not overheat) by warming over a double boiler with frequent whisking; or heating in the microwave for 20-second increments and whisking well between each heating.
  5. The sauce will thicken while heating. Add small amounts of water at a time to thin if desired.
  6. Serve over steamed or roasted vegetables, baked potatoes, or vegan eggs benedict. Also, try a small amount stirred in to your tofu scramble for a really delicious twist. 

*Kala Namak (Indian black salt) gives an egg flavor.  You can omit this if you do not have it, and instead add sea salt to taste.

Adapted from Loving It Vegan

Categories
Snacks Vegetables

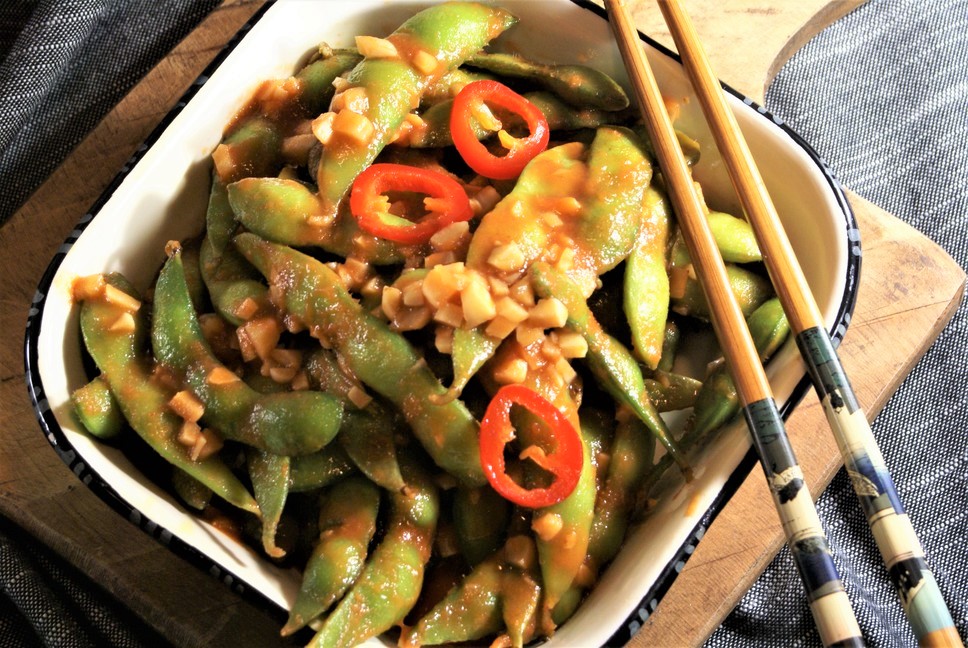
Chili-Garlic Edamame

Chili-Garlic Edamame

Our favorite edamame recipe! 

Serves about 3 as an appetizer or snack.

Ingredients:

  • 4 cloves of garlic, finely minced
  • 2 teaspoons olive oil
  • 2 tablespoons sake or dry white wine
  • 2 teaspoons tomato paste
  • 1 teaspoon sriracha chili sauce (or more to taste)
  • ¼ teaspoon salt
  • 1 tablespoon vegan butter
  • 2 tablespoons water
  • ¼ teaspoon sugar
  • 8 oz edamame pods, cooked according to package directions
  • Squeeze of lemon juice (optional)

Instructions:

  1. Heat oil in medium-sized pan over medium heat and sauté minced garlic for about 7 minutes, until softened. (Do not scorch garlic).
  2. Add the remainder of sauce ingredients (excluding edamame and lemon) and warm for about 4 minutes until reduced and moderately thickened. (The vegan butter is what really makes this sauce delicious and can be reduced to 2 teaspoons but not deleted.)
  3. Toss edamame pods in the sauce allowing to warm for about 1 minute. Move to serving dish and top with a small squeeze of lemon (optional). Garnish with sesame seeds if desired.
Categories
Vegetables

Southern Collard Greens

Southern Collard Greens

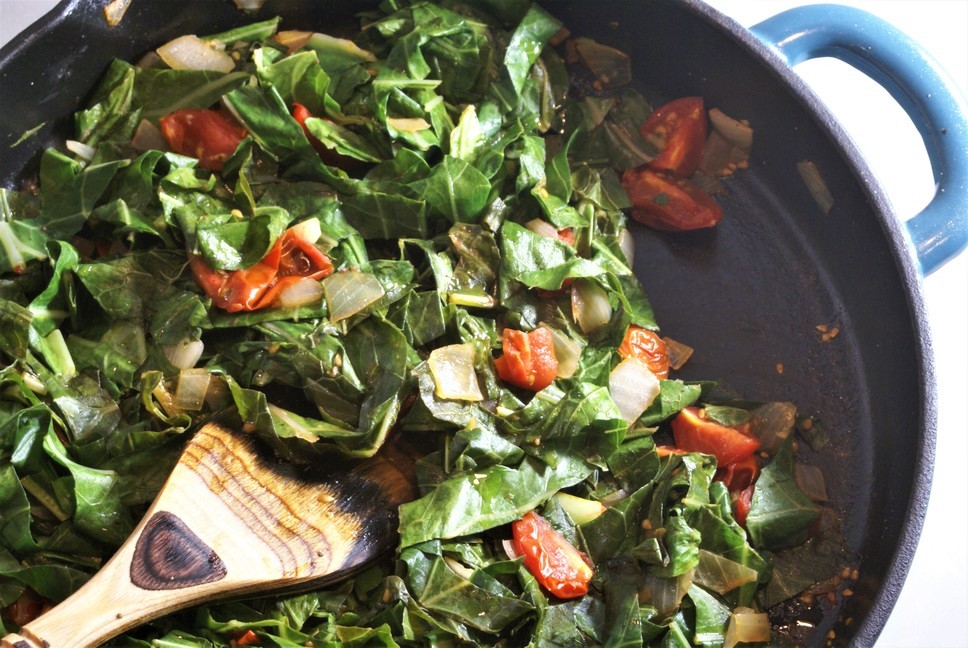
This is an easy and delicious way to enjoy collards – low in fat but not in taste! Use smoked paprika for a more traditional take or sweet paprika for a milder version.

Ingredients:

  • 1 tablespoon olive or avocado oil
  • 2 cloves garlic, pressed or minced
  • 1 yellow onion, diced
  • 1 cup cherry tomatoes, quartered
  • 1 bunch collard greens
  • 1-2 teaspoons apple cider vinegar
  • 1 teaspoon paprika (smoked or sweet, depending on preference)
  • salt and black pepper, to taste

Instructions:

  1. Trim the collard greens, removing thick central ribs, stacking the leaves, and then slicing thinly.
  2. Heat oil in a large skillet over medium heat. Add the onions and cook until they soften and color slightly, about 5 minutes.
  3. Stir in the tomatoes and garlic, cooking about 2 minutes to soften.
  4. Add the chopped collard greens, paprika and 1 teaspoon vinegar, and stir, coating the greens.
  5. Reduce the heat to low, and cook until the greens are wilted and dark green, about 20 minutes, stirring frequently. Cook longer if softer greens are desired. Add a tablespoon of water at a time, if needed, to keep the greens from sticking to the pan.
  6. Season to taste with salt and pepper. Adjust seasonings, adding additional vinegar if desired.
Categories
Sauces, Dips & Dressings Snacks Vegetables

Fermented Garlic Pickles

Fermented Garlic Pickles

These pickles are so fantastic that you will not want to go back to store-bought pickles. But don’t worry, the recipe is easy. And after your first batch, you will be an expert fermenter! You can always double or triple the recipe if you have the fridge space.

Ingredients:

  • 2 lbs. pickling cucumbers– try to find similar sized
  • 5 cups water (non-chlorinated)
  • 2 tablespoons fine sea salt (not iodized) 
  • 1/4 teaspoon turmeric
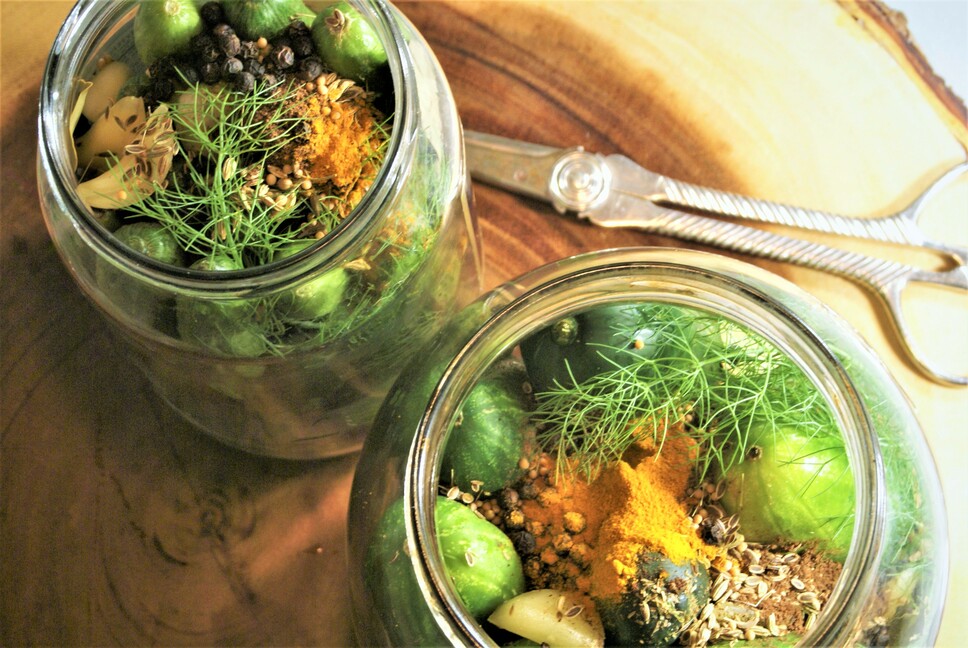
  • Spices of your choice, use as many of these as you have on hand: 1 teaspoon each per jar: fennel seeds, coriander seeds, allspice, dill seeds, mustard seeds, celery seeds
  • 12 garlic cloves – 6 per jar, sliced
  • Fresh dill sprigs (optional)
  • 1 fresh red chili pepper or ½ teaspoon chili flakes (optional)
  • 6 bay leaves – 3 per jar (not optional- tannins are needed for crispness).

Supplies:

  • 2 (quart-sized) jars
  • Airlock fermentation lids (vs. fermentation weights or sandwich-sized Ziplock bags)

Instructions:

  1. Prepare canning jars: It is not clear whether sterilization of jars is necessary for fermenting vegetables as the lactic acid bacteria create an environment that other microbes do not like. That said, better safe than sorry ….so a painless method of pasteurization can be achieved using your microwave.  Wash the jars for canning with soap and water and rinse well.  Leave about 1/2 teaspoon water in each jar and microwave the glass jars for about 4 minutes.  Cool jars to room temperature.
  2. Rinse the cucumbers and leave whole, slicing about 1/16 inch off of the blossom end (opposite of the stem end). This is critical for keeping your pickles crunchy.
  3. Make the brine: Mix 2 tablespoons salt and 5 cups water until dissolved. Add the turmeric and stir to combine.
  4. Place the whole spices in the bottom of the jars. Then add one to two layers of cucumbers (depending on their length and the height of your jars), standing on end, then add garlic, fresh dill sprigs, chilies, bay leaves.
  5. Press the contents down, leaving at least an inch at the top of the jar. Pour the brine over the pickles, leaving one inch between the top of the jar and the top of the brine. At this point you either need airlock lids (recommended if you are going to ferment on a regular basis) or need to place a weight on the pickles to keep them submerged in the brine so that they do not mold. To do this, you can use fermentation weights (or a small zip lock bag filled with a few tablespoons of water and burped of air) to set on top and weigh-down the pickles.
  6. Place the jars into a small baking pan (to catch any overflow) and cover the jars (with airlock lids, their own lid loosely applied, or a cloth). You can cover and screw the lid on tightly but if you do this, you have to remember to “burp” it every day or so!
  7. Place the jar in a cool dark place (below 70F) for 3-7 days (a lower kitchen cabinet or pantry). After 3 days, check for signs of life: bubbles, and clouding.  Tap the jar, and see if tiny bubbles rise to the top. Taste. The longer you ferment the softer and more tart the pickles will become and the more beneficial bacteria will be present. Mildly sour pickles that remain somewhat crisp will about 3 days. Longer  fermentation will make a more sour pickle that is softer.
  8. When the pickles are fermented to your liking, place the jar in the fridge. The pickles will continue to ferment, but much more slowly.

Notes:

If more brine is needed, make additional with the same ratio- 1 heaping teaspoon (7 grams) sea salt per one cup of water, for a 3% brine solution.

If you notice a white film on the top of the jar, you may have white mold which is harmless but may change the flavor of your pickles. This will not happen with an airlock lid, making these lids a worthwhile investment.

Recipe adapted from FeastingatHome.com