Fermented Garlic Pickles
These pickles are so fantastic that you will not want to go back to store-bought pickles. But don’t worry, the recipe is easy. And after your first batch, you will be an expert fermenter! You can always double or triple the recipe if you have the fridge space.
Ingredients:
- 2 lbs. pickling cucumbers– try to find similar sized
- 5 cups water (non-chlorinated)
- 2 tablespoons fine sea salt (not iodized)
- 1/4 teaspoon turmeric
- Spices of your choice, use as many of these as you have on hand: 1 teaspoon each per jar: fennel seeds, coriander seeds, allspice, dill seeds, mustard seeds, celery seeds
- 12 garlic cloves – 6 per jar, sliced
- Fresh dill sprigs (optional)
- 1 fresh red chili pepper or ½ teaspoon chili flakes (optional)
- 6 bay leaves – 3 per jar (not optional- tannins are needed for crispness).
Supplies:
- 2 (quart-sized) jars
- Airlock fermentation lids (vs. fermentation weights or sandwich-sized Ziplock bags)
Instructions:
- Prepare canning jars: It is not clear whether sterilization of jars is necessary for fermenting vegetables as the lactic acid bacteria create an environment that other microbes do not like. That said, better safe than sorry ….so a painless method of pasteurization can be achieved using your microwave. Wash the jars for canning with soap and water and rinse well. Leave about 1/2 teaspoon water in each jar and microwave the glass jars for about 4 minutes. Cool jars to room temperature.
- Rinse the cucumbers and leave whole, slicing about 1/16 inch off of the blossom end (opposite of the stem end). This is critical for keeping your pickles crunchy.
- Make the brine: Mix 2 tablespoons salt and 5 cups water until dissolved. Add the turmeric and stir to combine.
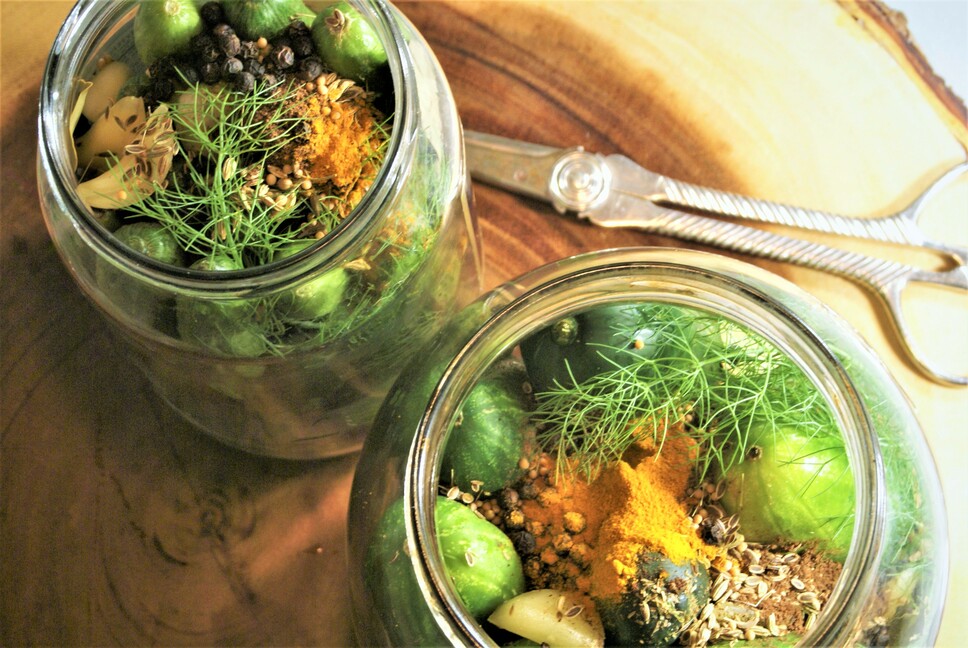
- Place the whole spices in the bottom of the jars. Then add one to two layers of cucumbers (depending on their length and the height of your jars), standing on end, then add garlic, fresh dill sprigs, chilies, bay leaves.
- Press the contents down, leaving at least an inch at the top of the jar. Pour the brine over the pickles, leaving one inch between the top of the jar and the top of the brine. At this point you either need airlock lids (recommended if you are going to ferment on a regular basis) or need to place a weight on the pickles to keep them submerged in the brine so that they do not mold. To do this, you can use fermentation weights (or a small zip lock bag filled with a few tablespoons of water and burped of air) to set on top and weigh-down the pickles.
- Place the jars into a small baking pan (to catch any overflow) and cover the jars (with airlock lids, their own lid loosely applied, or a cloth). You can cover and screw the lid on tightly but if you do this, you have to remember to “burp” it every day or so!
- Place the jar in a cool dark place (below 70F) for 3-7 days (a lower kitchen cabinet or pantry). After 3 days, check for signs of life: bubbles, and clouding. Tap the jar, and see if tiny bubbles rise to the top. Taste. The longer you ferment the softer and more tart the pickles will become and the more beneficial bacteria will be present. Mildly sour pickles that remain somewhat crisp will about 3 days. Longer fermentation will make a more sour pickle that is softer.
- When the pickles are fermented to your liking, place the jar in the fridge. The pickles will continue to ferment, but much more slowly.
Notes:
If more brine is needed, make additional with the same ratio- 1 heaping teaspoon (7 grams) sea salt per one cup of water, for a 3% brine solution.
If you notice a white film on the top of the jar, you may have white mold which is harmless but may change the flavor of your pickles. This will not happen with an airlock lid, making these lids a worthwhile investment.
Recipe adapted from FeastingatHome.com