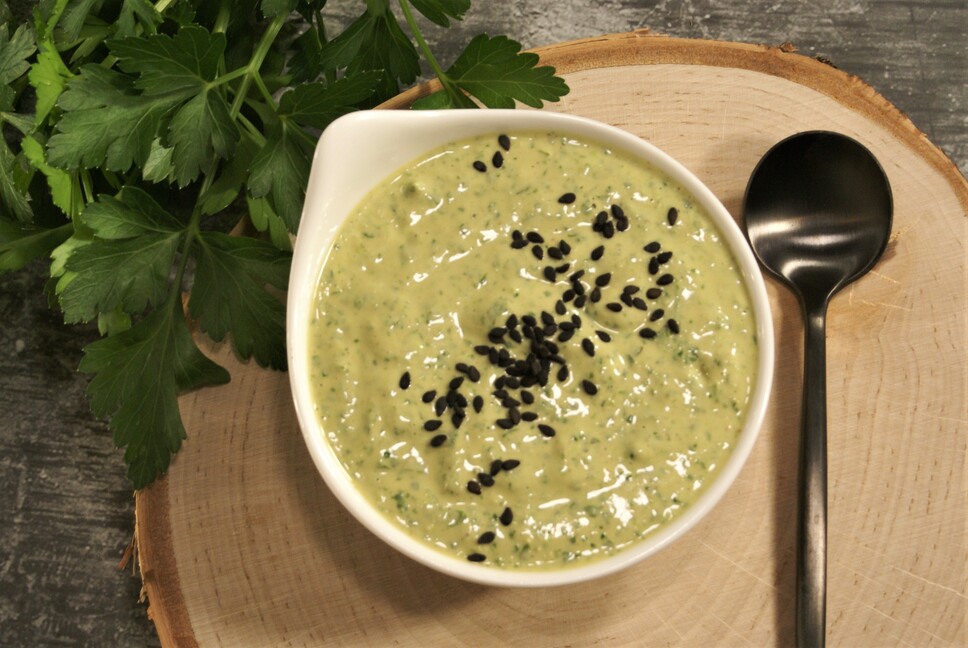
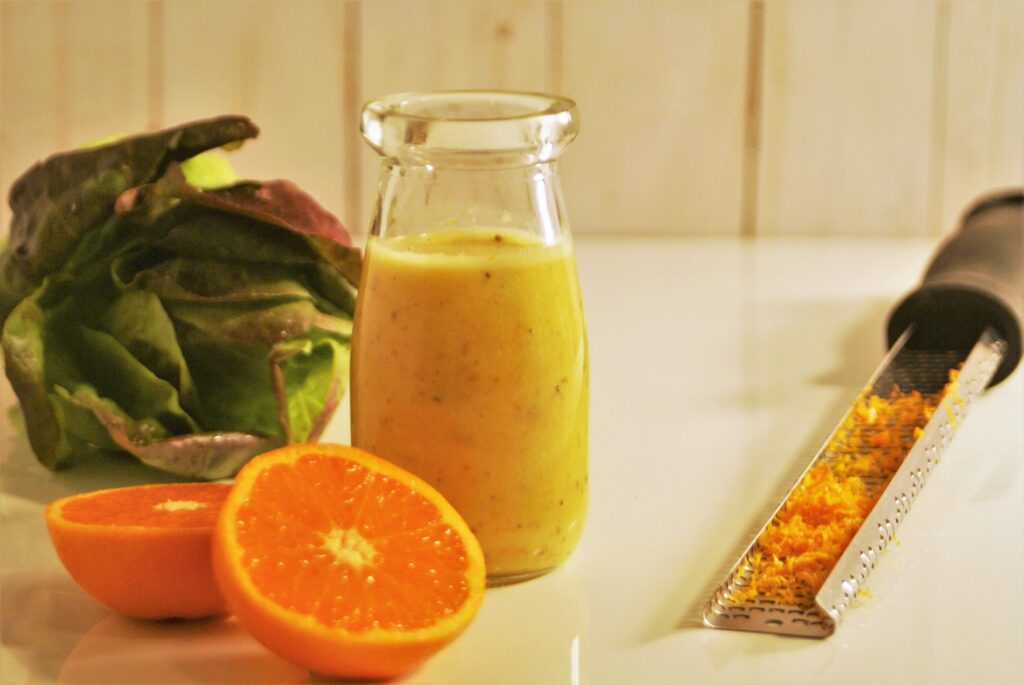
This dressing is absolutely packed with flavor! Use as much of the herbs as you want, in the proportion that you desire. The fresh herbs make this dressing a phytonutrient superstar!
This makes a great dressing for salads or bowls, a drizzle for steamed vegetables, or as a crudité dip.
Makes about 2 cups
Ingredients
1/2 chopped shallot or 2 T chopped onion
2 cloves garlic
2 T white wine vinegar or lemon juice
3/4 cup mayo (homemade, vegan, or other favorite type)
3/4 cup yogurt (plant-based or other favorite)
1 tsp Sriracha, more to taste
¼ tsp salt and pepper, more to taste
Fresh dill, cilantro, basil and parsley (2-3 tightly packed tablespoons of each)
Instructions
Add all ingredients to blender and blend until smooth.
Taste and adjust seasonings, adding more spice or herbs as desired.
Full of healthful probiotics! Use as a topping for tacos, sandwiches, wraps….
Fermentation is a fun and easy experiment right in your own pantry. And the results are delicious and healthful.
Fermented red onions are closer in texture and taste to cooked onions than raw. The process of fermentation breaks down the onion’s crisp texture, making them milder with a delicate crunch. And fermenting creates probiotic cultures that are healthful for our gut.
Ingredients:
2 cups non-chlorinated (or filtered) water
2 tsp sea salt or kosher salt (not iodized)
1 large red onion, sliced thinly
2 teaspoons (or more) sugar, or other sweetener (optional)
Instructions:
Prepare canning jars: It is not clear whether sterilization of jars is necessary for fermenting vegetables as the lactic acid bacteria create an environment that other microbes do not like. That said, better safe than sorry ….so, a painless method of sterilization can be achieved using your microwave. Wash the jars for canning with soap and water and rinse well. Microwave your glass jars for about 4 minutes until the water has evaporated. Cool jars to room temperature.
Add the sea salt to the water and stir to dissolve.
Put the sliced red onions into a mason jar, packing them in tightly.
Pour the brine over the onions, leaving one inch between the top of the jar and the top of the brine. At this point you either need airlock lids (recommended if you are going to ferment on a regular basis) or need to place a weight on the onions to keep them submerged in the brine so that they do not mold. To do this, you can use fermentation weights (or a small zip lock bag filled with a few tablespoons of water and burped of air) to set on top and weigh-down the onions.
Place the jar into a small baking pan (to catch any overflow) and cover the jars. We like to cover the jar loosely with its own lid. Other options are to use an airlock lid (find online) or cover with a cloth. You can cover and screw the lid on tightly but if you do this, you have to remember to “burp” it every day or so!
Place the jar in a cool dark place (below 70F) such as a lower kitchen cabinet or pantry. After 3 days, check for signs of life: bubbles, and clouding. Tap the jar, looking for tiny bubbles that rise to the top. Taste. Your fermented onions should smell oniony and taste pleasantly tangy/sour. The longer you ferment the softer and more tart the onions will become and the more beneficial bacteria will be present. Ferment up to 3 weeks. (We usually ferment for about 2 weeks).
After fermentation, if desired, add 2 teaspoons sugar (or more), mixing well to combine.
Refrigerate.
Notes:
If more brine is needed, make additional with the same ratio- 1 heaping teaspoon (7 grams) sea salt per one cup of water, for a 3% brine solution.
If you notice a white film on the top of the jar, you may have white mold which is harmless but may change the flavor of your onions. This will not happen with an airlock lid, making these lids a worthwhile investment.
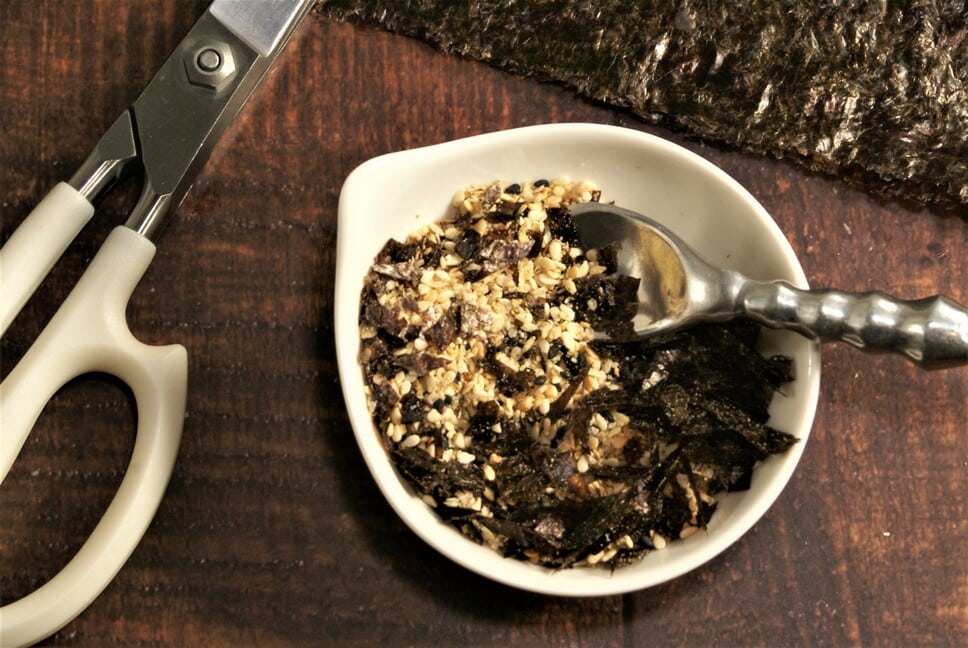
A delicious spice blend that adds flavor and flair to rice, vegetables, Asian pasta dishes, etc., etc.
Ingredients
1/4 cup white sesame seeds
1-2 nori sheets (seasoned or plain)
1/4 teaspoon salt, or more to taste
1/4 teaspoon sugar
1 tablespoon black sesame seeds
1/4 teaspoon red chili pepper flakes
Instructions
In a food processor or spice grinder, pulse white sesame seeds once or twice to partly grind, keeping some whole.
Place white seeds in a dry pan (or sauté pan) with black sesame seeds and red pepper flakes (if using) on medium-low heat, stirring occasionally until lightly toasted, about 5 minutes.
Cut nori sheets into small pieces with kitchen shears or a sharp knife, or crumble with your hands.
Combine nori and sesame seed mixture in a small bowl. Add salt and sugar, stirring to combine.
Can be stored in an air-tight container for 4-6 months.
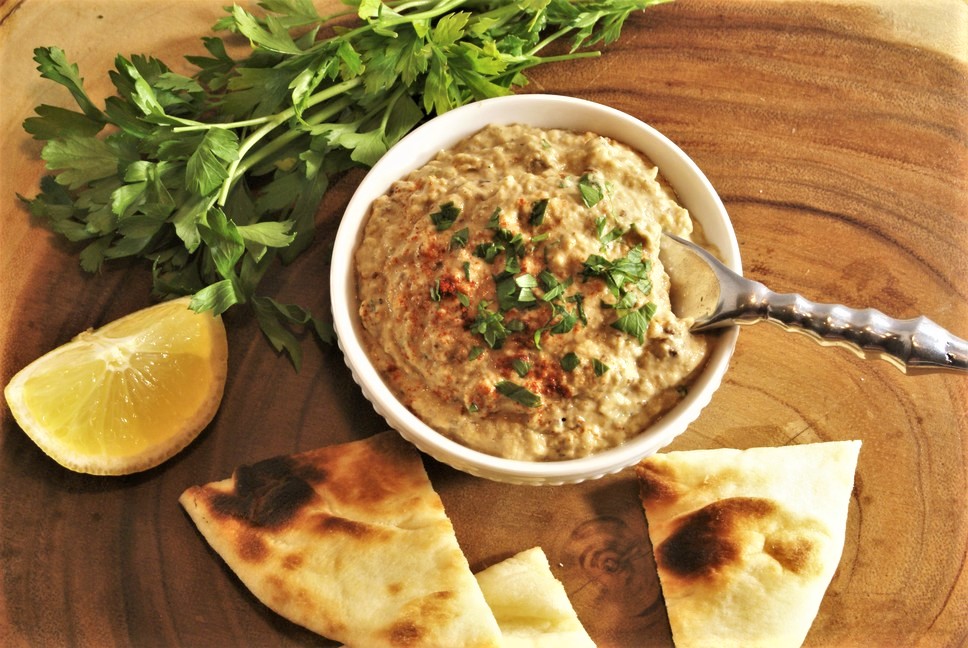
Makes about 2 cups (enough to serve 4 to 6 as an appetizer).
Ingredients:
2 ½ pounds Italian eggplants (about 2 medium eggplants)
2-3 medium cloves of garlic, pressed or finely minced
3 tablespoons lemon juice, or more to taste
¼ cup tahini
1 tablespoon extra-virgin olive oil, more for garnish if desired
2 tablespoons chopped fresh flat-leaf parsley, plus extra for garnish
¾ teaspoon salt, or to taste
¼ teaspoon ground cumin
Pinch of smoked paprika, for garnish (optional)
Instructions:
Preheat the oven to 450 degrees F. Place the oven rack in the upper third of the oven. Line a large, rimmed baking sheet with foil and spray foil surface lightly with olive (or avocado) oil spray. Halve the eggplants lengthwise and place them in the lined pan with the halved sides down.
Roast the eggplant until the interior is very tender throughout and the eggplant begins to collapse, about 40 minutes. Turn the broiler on and broil to char the skin of the eggplant – watching closely – for about 4 minutes.
Set the eggplant aside for about 5 minutes until cool enough to handle. Turn the eggplants over, scooping out the flesh with a large spoon, discarding the skin.
Place the eggplant into a mesh strainer and drain over the sink or a bowl for about 10 minutes, stirring occasionally to release more liquid.
In the meantime, place the remainder of the ingredients, except the chopped parsley, into the bowl of a food processor. Add the drained eggplant. Pulse repeatedly until coarsely blended (there should still be some texture).
Add the finely chopped parsley and pulse a few times to combine. Taste and adjust seasonings.
Transfer the baba ghanoush to a serving bowl and lightly drizzle olive oil on top, if desired. Sprinkle with parsley and/or smoked paprika.
Serve with warmed pita bread, cucumber slices, crackers, etc. Or layer on a sandwich.
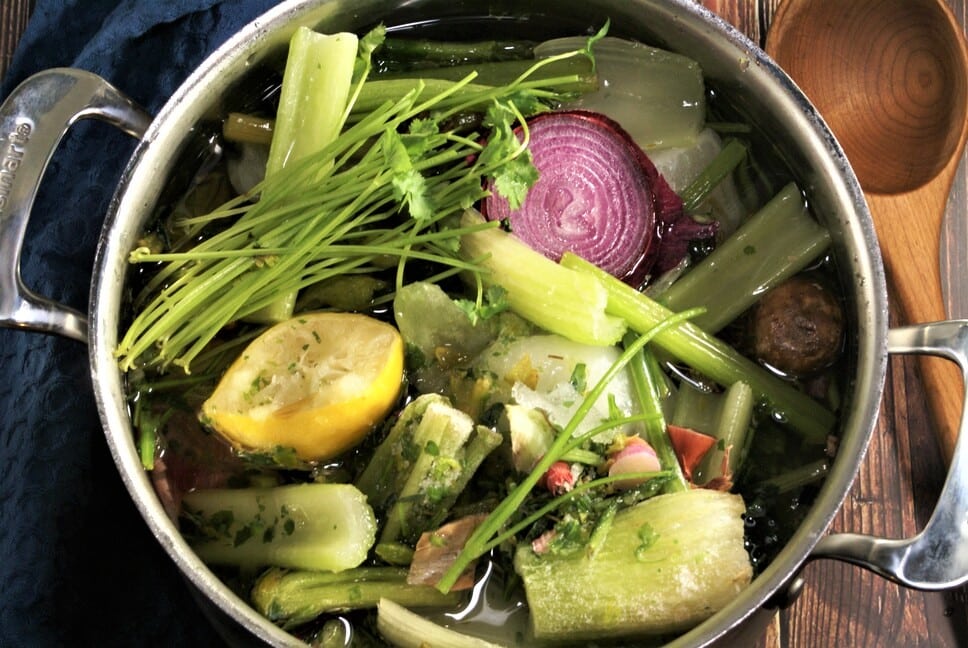
Save your vegetable scraps such as carrot tops, trimmings from onions, fennel, parsley and celery, really any vegetable that you like (except the cruciferous family like broccoli, cabbage and brussels sprouts as they can overpower) and place in a large container or plastic bag in your freezer.
Continue to add vegetable scraps until you have enough to fill a pot. Then place the frozen veggie scraps into a large stock-pot and cover with water. Bring to a boil, then cover and simmer until the vegetables have softened and have begun to break down. Remove from the heat and keep covered. Cool to room temperature, strain-out and discard (or compost) the solids. You have created a flavorful unsalted broth! Add salt as needed for your recipes.
And remember, when cooking any meal, do not add salt until the very end. If added during cooking, much of the salt ends up inside of the food where you won’t taste it. Salting at the end (or just individually at the table) means that you will add a lot less salt. And whatever you do add, will be able to be tasted and enjoyed!
This Middle Eastern dip is very versatile and can be used to drizzle over vegetables, as a dip for crudités, or slathered in a sandwich. And feel free to change up the herbs to fit your mood….try combination of any: parsley, cilantro, basil, mint and dill. Or add jalapeño for some heat.
Makes 8 generous servings
Ingredients
3 garlic cloves, crushed or pressed
1 cup coarsely chopped fresh cilantro
1 cup coarsely chopped fresh parsley
5 green onions, green tops separated and coarsely chopped
1 teaspoon ground cumin
1 teaspoon salt, plus more to taste
1 cup tahini
¼ cup fresh lemon juice, plus more to taste
Instructions
Pulse garlic, cilantro, parsley, green onion tops, cumin, and 1 tsp. salt in a food processor until similar in texture to pesto. Add tahini and lemon juice; process 30 seconds (mixture will be very thick).
With motor running, gradually drizzle in ¾ cup water and process, adding more water to thin if needed, until sauce is fairly smooth and the consistency of sour cream. Taste and adjust seasonings with more salt or lemon juice if desired.
This is a quick and easy recipe that comes together in under 30 minutes. The sauce is so delicious (and healthy) that you will find lots of uses for it.
Serves 3-4
Ingredients
8 ounces dry pasta (such as fettuccine, linguine, spaghetti)
Olive oil spray
8 ounces sliced mushrooms (such as cremini, shiitake, portobellos, or wild mushroom mix)
Creamy Artichoke Sauce Ingredients
1 jar or can artichoke hearts in water (10–12 ounces … about 1 1/2 cups), drained (or use frozen)
3/4 cup veggie broth, more to thin as needed
¼ cup raw unsalted sunflower seeds (or raw cashews soaked in boiling water for 5-10 minutes)
10 fresh sage leaves (or sub 1/4 cup Italian parsley, or fresh basil, or 1 ½ tsp dried thyme), extra for garnish if desired
1–2 garlic cloves
1/2 teaspoon salt (optional)
1/2 teaspoon freshly ground pepper
1 tablespoon lemon juice, use to taste
Instructions
Cook the pasta. Bring big pot of water to a boil. Cook the pasta to al dente.
Optional: pan-fry fresh herbs for garnish. Spray a large skillet with oil spray or add a thin layer of oil and heat over medium heat. Add fresh herb leaves (this works best for sage or parsley). Fry gently until crisped and set aside.
Cook the mushrooms. While water is boiling, spray the same skillet with oil spray and sauté the mushrooms over medium-high heat. Set aside.
Make the artichoke sauce. Drain the artichoke hearts and place them in a blender (don’t use a food processor, it will not get this sauce creamy enough). Add broth, sunflower seeds, herbs, garlic, salt, and pepper. (Feel free to add a little more broth if needed to blend.) Blend on high speed until creamy and silky smooth. Add lemon juice, a bit at a time, to taste, for a little brightness of flavor.
Combine ingredients. Add the cooked, drained pasta (do not rinse) to the cooked mushrooms in the sauté pan. Toss with the artichoke sauce and heat gently, stirring to combine. Taste and adjust seasonings. Serve topped with crisped (or freshly chopped) herbs.
1/4 cup extra-virgin olive oil (or 2 T olive oil and 2 T sunflower seeds or nut butter)
Instructions:
Add all ingredients to a dressing container or jar. Whisk or cover tightly and shake until the dressing is combined. If using sunflower seeds or other nuts, combine in blender or immersion blender.
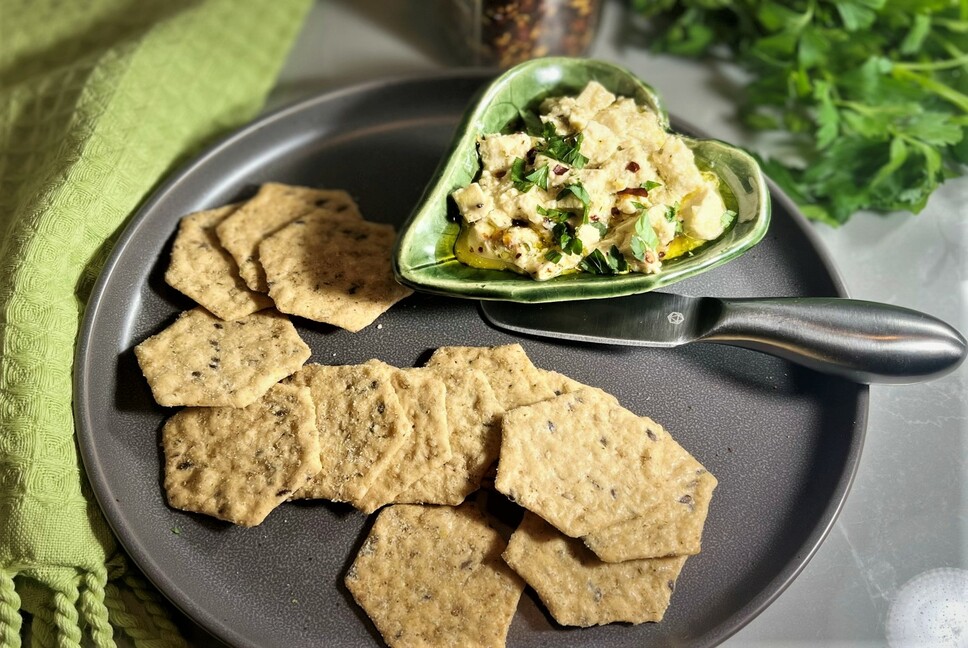
This recipe will please even the pickiest cheese lovers.
Ingredients:
Extra-firm tofu, 14-ounce block
3 tablespoons white miso paste
3 tablespoons apple cider vinegar
1/4 cup lemon juice
2 tablespoons extra virgin olive oil
4 garlic cloves crushed or pressed
3 tablespoons nutritional yeast
1 tablespoon dried oregano
1/2 teaspoon onion powder
1 tablespoon chopped fresh parsley
1/4 teaspoon salt
1/2 teaspoon black pepper
½ teaspoon red pepper flakes (optional)
Instructions:
Drain the tofu and slice vertically into 4 slabs. Press tofu with a tofu press. (Or, line a colander with a few layers of paper towels or a clean dish towel. Place the tofu slabs on top, cover the tofu with another paper towel or clean dish towel. Next, weigh the tofu down with a heavy pan). Press the tofu for at least 30 minutes to one hour.
Once pressed, cut the tofu into small cubes.
In a medium bowl, whisk together the miso, vinegar, lemon juice, oil, garlic, nutritional yeast, oregano, onion powder, parsley, salt, pepper, and red pepper flakes (if using) until smooth. Add the tofu pieces and stir gently to coat.
Refrigerate for 4 to 48 hours. Serve with crackers or pita, or top a salad, sandwich, wrap or pasta. Try combining with diced watermelon and arugula for a refreshing salad.
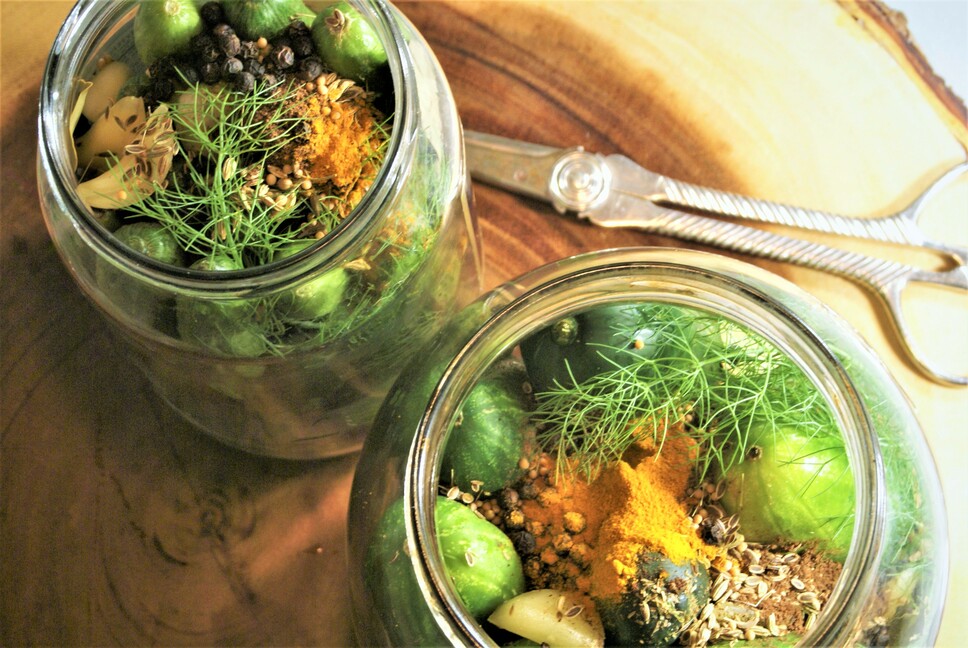
These pickles are so fantastic that you will not want to go back to store-bought pickles. But don’t worry, the recipe is easy. And after your first batch, you will be an expert fermenter! You can always double or triple the recipe if you have the fridge space.
Ingredients:
2 lbs. pickling cucumbers– try to find similar sized
5 cups water (non-chlorinated)
2 tablespoons fine sea salt (not iodized)
1/4 teaspoon turmeric
Spices of your choice, use as many of these as you have on hand: 1 teaspoon each per jar: fennel seeds, coriander seeds, allspice, dill seeds, mustard seeds, celery seeds
12 garlic cloves – 6 per jar, sliced
Fresh dill sprigs (optional)
1 fresh red chili pepper or ½ teaspoon chili flakes (optional)
6 bay leaves – 3 per jar (not optional- tannins are needed for crispness).
Supplies:
2 (quart-sized) jars
Airlock fermentation lids (vs. fermentation weights or sandwich-sized Ziplock bags)
Instructions:
Prepare canning jars: It is not clear whether sterilization of jars is necessary for fermenting vegetables as the lactic acid bacteria create an environment that other microbes do not like. That said, better safe than sorry ….so a painless method of pasteurization can be achieved using your microwave. Wash the jars for canning with soap and water and rinse well. Leave about 1/2 teaspoon water in each jar and microwave the glass jars for about 4 minutes. Cool jars to room temperature.
Rinse the cucumbers and leave whole, slicing about 1/16 inch off of the blossom end (opposite of the stem end). This is critical for keeping your pickles crunchy.
Make the brine: Mix 2 tablespoons salt and 5 cups water until dissolved. Add the turmeric and stir to combine.
Place the whole spices in the bottom of the jars. Then add one to two layers of cucumbers (depending on their length and the height of your jars), standing on end, then add garlic, fresh dill sprigs, chilies, bay leaves.
Press the contents down, leaving at least an inch at the top of the jar. Pour the brine over the pickles, leaving one inch between the top of the jar and the top of the brine. At this point you either need airlock lids (recommended if you are going to ferment on a regular basis) or need to place a weight on the pickles to keep them submerged in the brine so that they do not mold. To do this, you can use fermentation weights (or a small zip lock bag filled with a few tablespoons of water and burped of air) to set on top and weigh-down the pickles.
Place the jars into a small baking pan (to catch any overflow) and cover the jars (with airlock lids, their own lid loosely applied, or a cloth). You can cover and screw the lid on tightly but if you do this, you have to remember to “burp” it every day or so!
Place the jar in a cool dark place (below 70F) for 3-7 days (a lower kitchen cabinet or pantry). After 3 days, check for signs of life: bubbles, and clouding. Tap the jar, and see if tiny bubbles rise to the top. Taste. The longer you ferment the softer and more tart the pickles will become and the more beneficial bacteria will be present. Mildly sour pickles that remain somewhat crisp will about 3 days. Longer fermentation will make a more sour pickle that is softer.
When the pickles are fermented to your liking, place the jar in the fridge. The pickles will continue to ferment, but much more slowly.
Notes:
If more brine is needed, make additional with the same ratio- 1 heaping teaspoon (7 grams) sea salt per one cup of water, for a 3% brine solution.
If you notice a white film on the top of the jar, you may have white mold which is harmless but may change the flavor of your pickles. This will not happen with an airlock lid, making these lids a worthwhile investment.